Flask By Example Tutorial: Templates, Inheritance & render_template() Example
In this post we will give you information about Flask By Example Tutorial: Templates, Inheritance & render_template() Example. Hear we will give you detail about Flask By Example Tutorial: Templates, Inheritance & render_template() ExampleAnd how to use it also give you demo for it if it is necessary.
Flask makes uses of the Jinja2 template engine. If you don’t know what is a template language, it’s simply HTML with variables and other programming constructs like conditional statement and for loops etc. This allows you to so some logic in the template itself. The template language is then rendered into plain HTML before being sent to the client.
Jinja2 is a powerful feature-packed template engine for Python heavily inspired by the built-in template engine of Django. It has features such as unicode support and template inheritance and is available under BSD license.
In a the Jinja template language, you need to put variables inside curly braces i.e ‘. For expressions and other logic like for loops, you need to put them between tags like{% … %}’ .
Note: You can create a Jinja template by simply creating an
htmlfile under the/templatesfolder in a Flask project.
Flask Templates Example
Let’s see a simple flask example that demonstrates how to work with templates.
Open a new terminal and create then activate a virtual environment using the following commands:
$ cd ~/demos$ mkdir flask-templates-example$ cd falsk-templates-example$ python3 -m venv .env $ source .env/bin/activateNext, install flask using pip:
$ pip install flaskNext, create a server.py file and add the following code:
importosfromflaskimportFlask,render_templateapp=Flask(__name__)@app.route("/")defindex():returnrender_template("index.html",message="Hello Flask!");if__name__=="__main__":app.run(host='0.0.0.0',port=8000,debug=True)We create a route / which is mapped to the index() function. This function renders the index.html template.
We use the render_template() method to render the index.html template which we’ll be creating in the templates folder of our project. Optionally, we can pass variables like the message variable that will be available to the template.
Next, create a templates folder and add an index.html file with the following content:
<!DOCTYPE html><html><head><title>Flask Template Example</title></head><body><div>{{ message }}</p></div></body></html>We use the curly braces to display the value of the message variable.
We can also pass complex types like lists. For example, change the render_template() line to the following:
defindex():returnrender_template("index.html",message="Hello Flask!",contacts=['c1','c2','c3','c4','c5']);We pass the message and contacts variables to our index.html template.
Now, open the templates/index.html file and update it as follows:
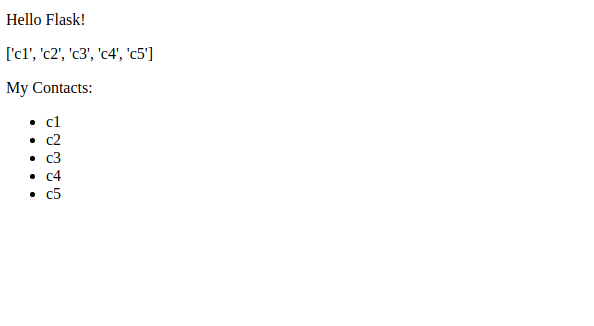
<!DOCTYPE html><html><head><title>Flask Template Example</title></head><body><div>{{ message }}</p>{{ contacts }}</p>My Contacts:</p><ul> {% for contact in contacts %} <li>{{ contact }}</li> {% endfor %} </ul></div></body></html>We use the curly braces to display the values of the message and contacts variables. Next, we use the {% for %} ... {% endfor %} loop to loop through the contacts list and display each value.
You can see a list of the supported control constructs in Jinja from the official docs.
You can run you application using the following command:
$ python server.pyThis will start a development server on port we specified i.e the 8000 port. You will get the following output in your web browser:
Template Inheritance in Jinja
One important feature in template languages is template inheritance i.e a child template can inherit or extend a base template. This will allow you to define your template and a clear and concise way and avoid complexity.
Imaging, you have an application with multiple pages and each page has the same header. If you want to change something in the header you would need to go through all the templates and change the header for each one which can be a tedious task. Thanks to template inheritance, you only need to create a base template that contains the common header code once and then make all the other templates extend the base template. Since the header portion is common between all templates and is defined only once in the base template, now you can change your header in only one place and all templates will inherit the updated header.
You can use the {% extends %} and {% block %} tags to work with template inheritance. The {% extends %} tag is used to specify the parent template that you want to extend from your current template and the {% block %} tag is used to define and override blocks in the base and child templates.
Let’s now see template inheritance by example.
Create a templates/base.html file and add the following code:
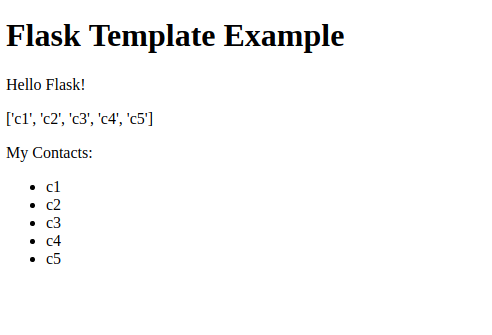
<!DOCTYPE html><html><head><title>Flask Template Example</title></head><body><h1>Flask Template Example</h1> {% block content %} {% endblock %}</body></html>We add a <h1>Flask Template Example</h1> header that will be common by all child templates that extends this base template. Next, we define a content block which will be overridden by the child templates to add their own code in this area.
Next, open the templates/index.html and add the following code:
{% extends "base.html" %}{% block content %}<div>{{ message }}</p>{{ contacts }}</p>My Contacts:</p><ul> {% for contact in contacts %} <li>{{ contact }}</li> {% endfor %} </ul></div>{% endblock %}We use the {% extends "base.html" %} tag to extend the base template and then we fill the content block with code specific to the index.html template.
Conclusion
In this quick tutorial, you have been introduced to templates and template inheritance in Flask with Jinja.
Hope this code and post will helped you for implement Flask By Example Tutorial: Templates, Inheritance & render_template() Example. if you need any help or any feedback give it in comment section or you have good idea about this post you can give it comment section. Your comment will help us for help you more and improve us. we will give you this type of more interesting post in featured also so, For more interesting post and code Keep reading our blogs